
EXE files are not intended to work on Mac, but there are workarounds to this. You can now easily run any EXE file on your macOS using its inbuilt tools. The best part of it is it’s a very easy process.
3 Simple Ways to Open and Run EXE Files on Mac
Sue Wayne
Jun 28, 2023 • Filed to: Solve Mac Problems • Proven solutions
Mac’s impressive library of apps gives you everything you need but let’s face it: Windows has a far larger library.
Haven’t you ever come across software native to Windows which endear itself to you? But since they all come with the EXE file extension, your Mac is incapable of running them. Well, there are workarounds to this problem and you’ll learn about them today.
It’s possible to safely open and run EXE files on your Mac using mediums like Boot Camp, Remote Desktop, CrossOver, Virtual Machine, and WINE, to mention the most prominent ones. And you don’t need to be an expert to do this. As long as you can follow simple instructions, you’re all set.
Как распаковать exe файл на Mac? | Открываем exe установщик без эмуляции windows на mac m1
- Part 1: Can You Run an EXE File on a Mac?
- Part 2: 3 Ways to Open and Run EXE Files on Mac
Part 1: Can You Run an EXE File on a Mac?
Yes, you can! With how innovative and creative developers have become, it was only a matter of time before they devised a means to run EXE files on Mac, even though such files are incompatible with macOS.
What’s an EXE file, though? It’s a file extension that denotes an executable file format. Okay, but what’s an executable file? It’s any file capable of being executed as a program. To put it simply, it’s what makes the installation and running of software possible.
EXE files are used in a few operating systems, the most notable of them being Microsoft Windows. You can think of EXE files as the Windows version of APP files (APP files, if you’re unaware, are executable files under macOS).
Go further and learn how to fix MS Word not responding on Mac.
— 2 minutes to read it.
Running EXE files on Mac is very possible but only through backdoor means, so to speak. You need an emulator (WINE is by far the most popular), or you install a virtual machine software on your macOS to enable you to load Windows VM or make an extra partition on your disk where you can simultaneously have both macOS and Windows in your Mac.
Part 2: 3 Ways to Open and Run EXE Files on Mac
Again, you have several options to choose from when attempting this. So many software out there can help you open EXE files on Mac. You are advised to go with the Parallel Desktop.
Open EXE Files on Mac Using Parallel Desktop
This software is simplistic and won’t take up much on your time because it doesn’t even require a Mac restart anytime you wish to run a Windows application. A copy of Microsoft Windows is required though. You have to install it on your hard disk but it’s easy to do:
Step 1: Windows Installation
- Open up your Mac’s Application folder and double-click on the «Parallels» icon (you have to do this to install Windows).
- Click on «File».
- Click on «New».

- Click on «Install Windows or another OS from DVD or image file».
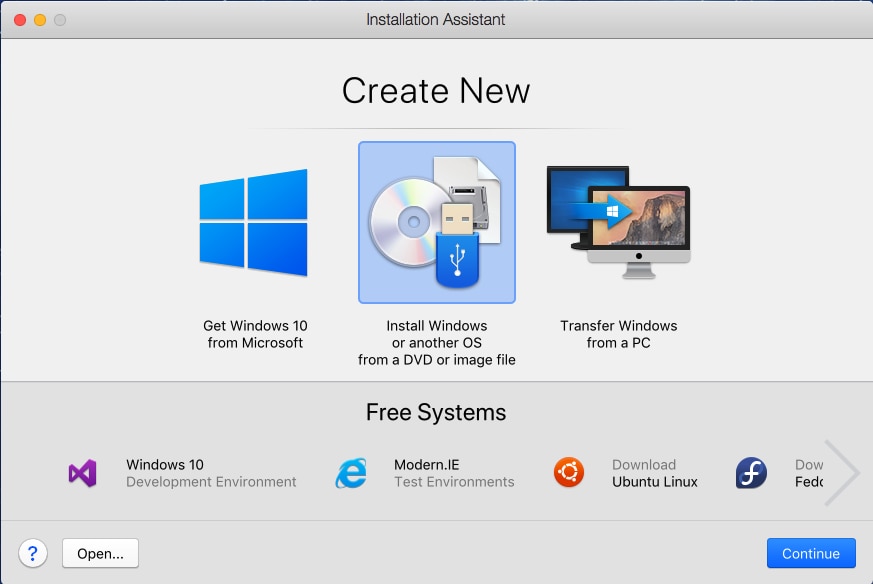
- Click on «Continue». You can easily install Windows either from a DVD or the more popular .iso disc image; or even a bootable USB drive.
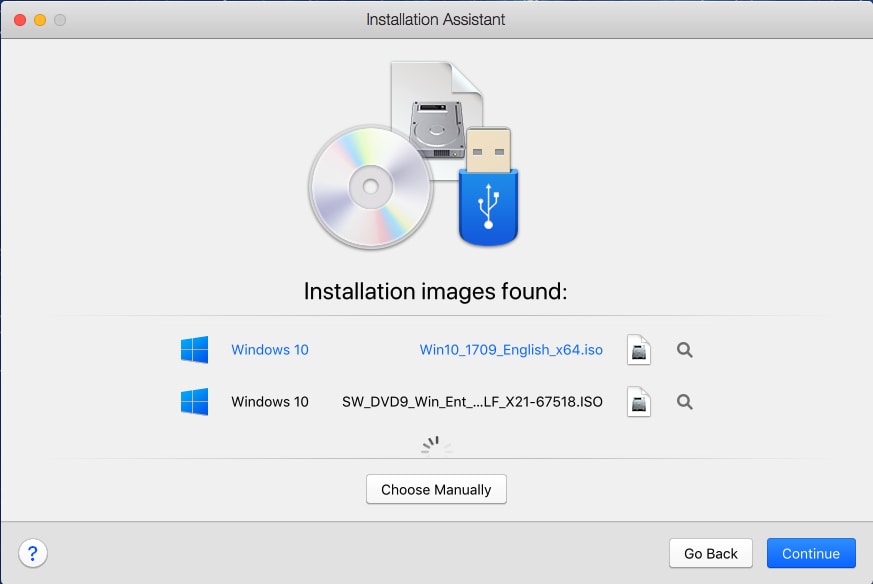
- You can even switch to the manual mode, locate the source for the Windows installation, and choose it by clicking on «Select a file…»
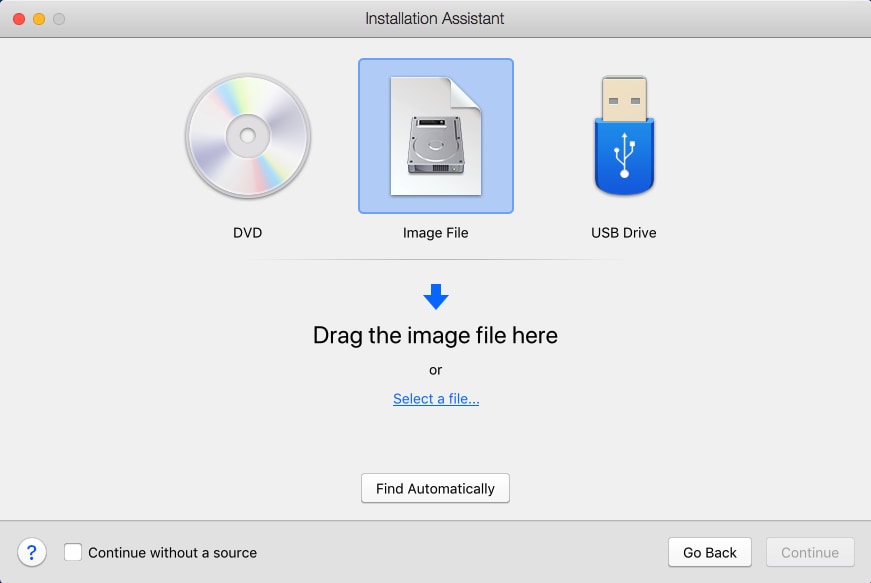
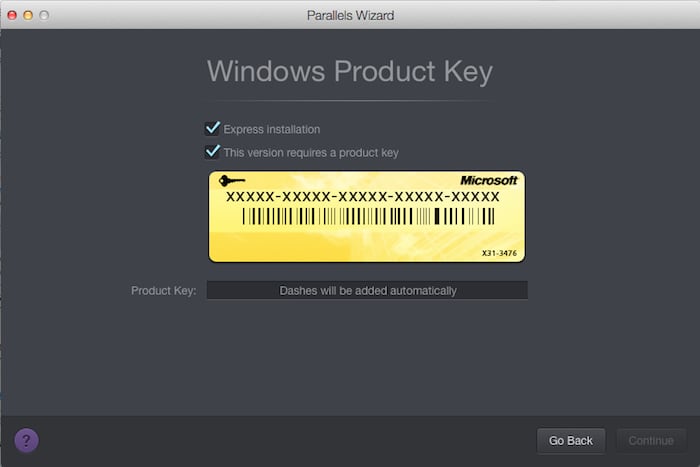
- Click on «Continue». You will be taken to a Windows product key window.
- Leave the «Express installation» as it is, input the key and click «Continue».
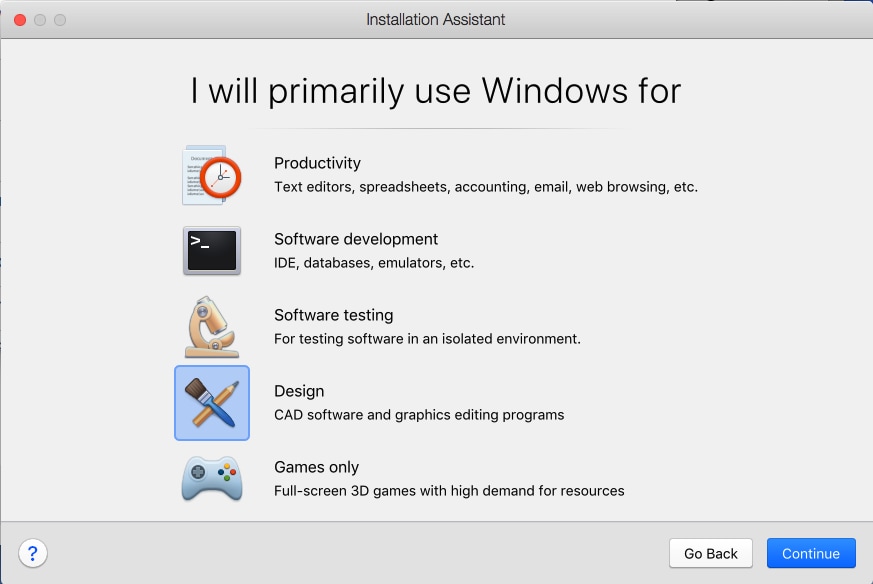
- You will be asked to select how you wish to use Windows: Whether for productivity, games only, software development, design, etc. Once you’re done selecting, click on «Continue».
- Type in a name for the virtual machine and select the directory or location for the Parallels Desktop.
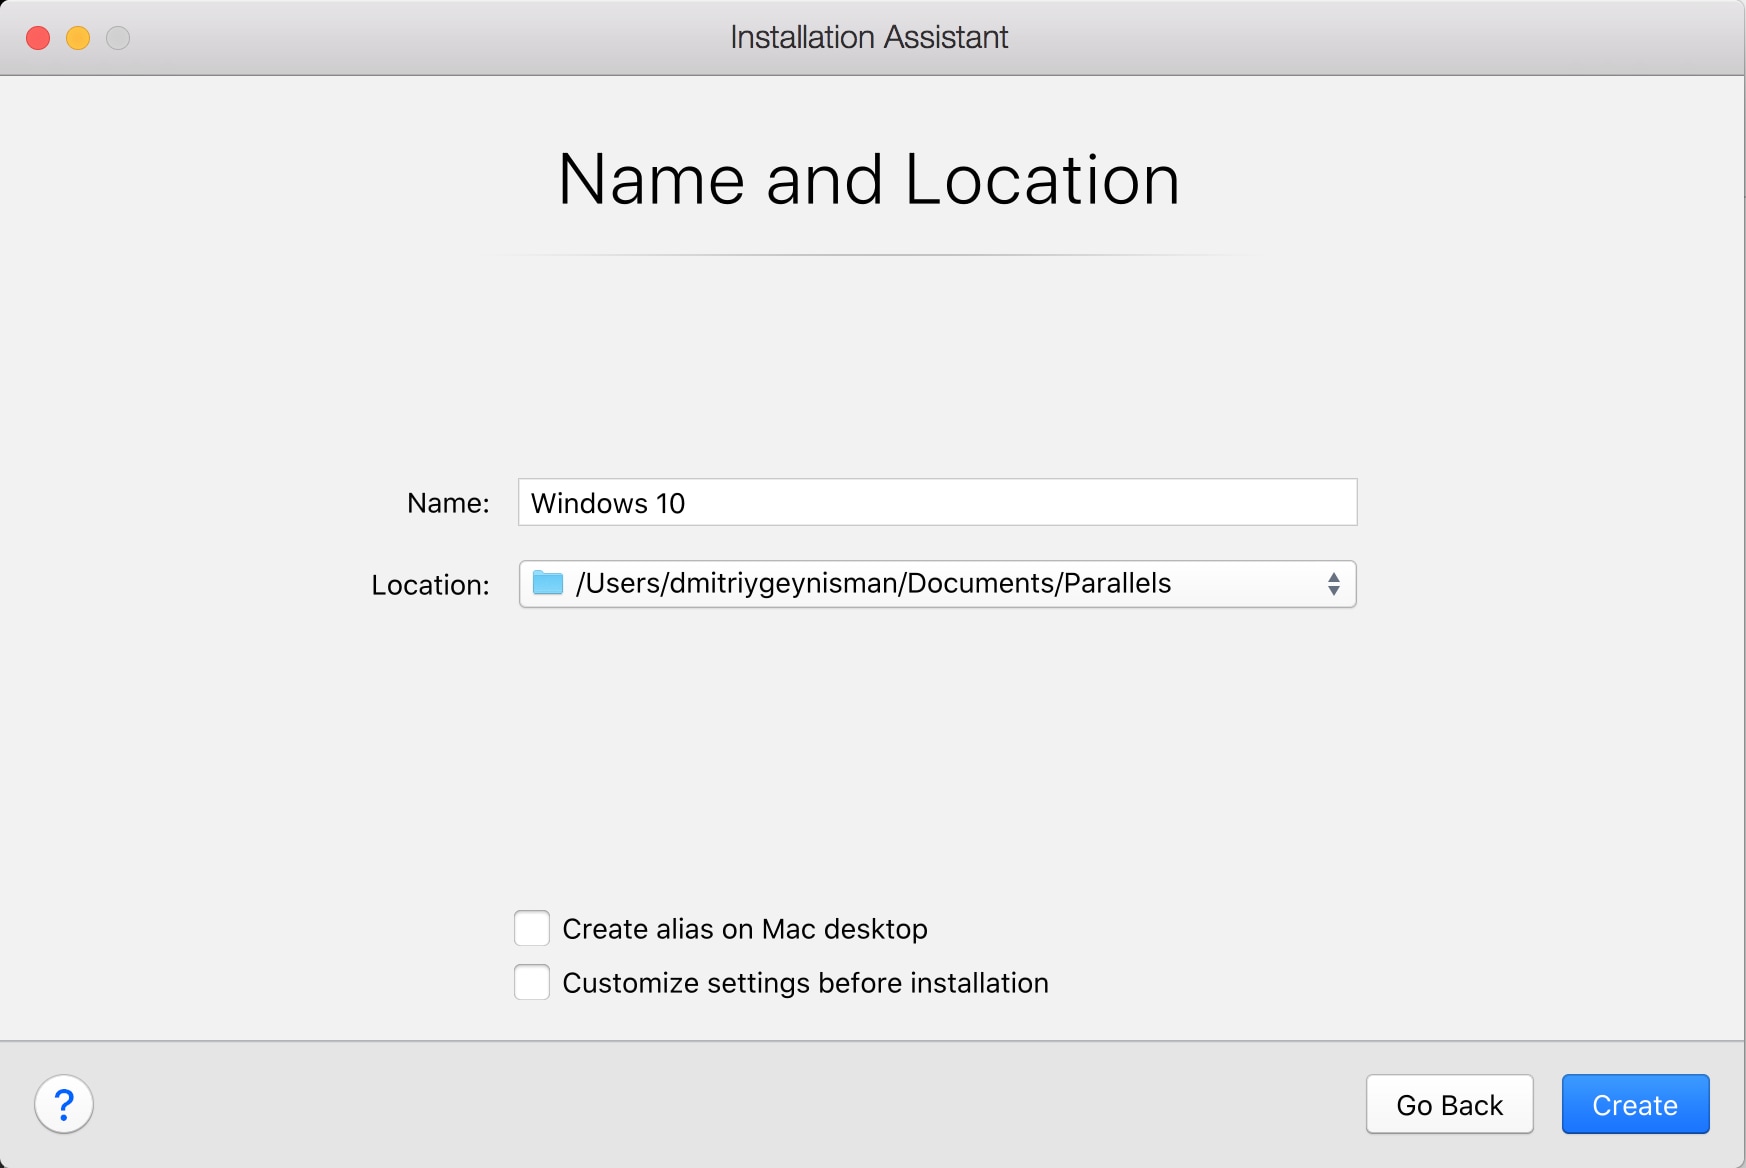
- Click on «Continue» and the Windows installation will commence. All Intel-based Macs are compatible with both 32 and 64-bit versions of Windows: From Windows XP to Windows 10.
- Once the installation concludes, you can open up Windows by clicking on the «Power» button in the list of the Parallels Virtual Machine.
Step 2: Using Parallels Desktop
- The very first time Windows restarts, «Parallels Tools» will be installed. This will be what ultimately integrates your Mac with your Windows desktops. After the installation is done, you will be asked to restart Windows.
- Open up your Parallels Desktop from «Spotlight.’
- Click on «Virtual Machine».
- Select «Configure» in the drop-down menu which appears.
- Click on «Options».
- Click on «Shared Folders».
- Click on «Add».
- Click on «Choose». Doing this will add a location from your Mac’s desktop to the virtual machine. Simply put any EXE file in this location to enable Windows to access and install them
Run EXE Files on Mac Using Boot Camp
The question now is not whether you want to run EXE files on your Mac, but rather how to go about it conveniently. There are countless of great Windows apps that never made it to macOS, and they probably never will. A lot of them have very attractive features that make Windows the envy of all Mac owners.
Running EXE files on Mac is made easy and convenient via Boot Camp and Remote Desktop. You can use any. It depends on preference and what you find more convenient.
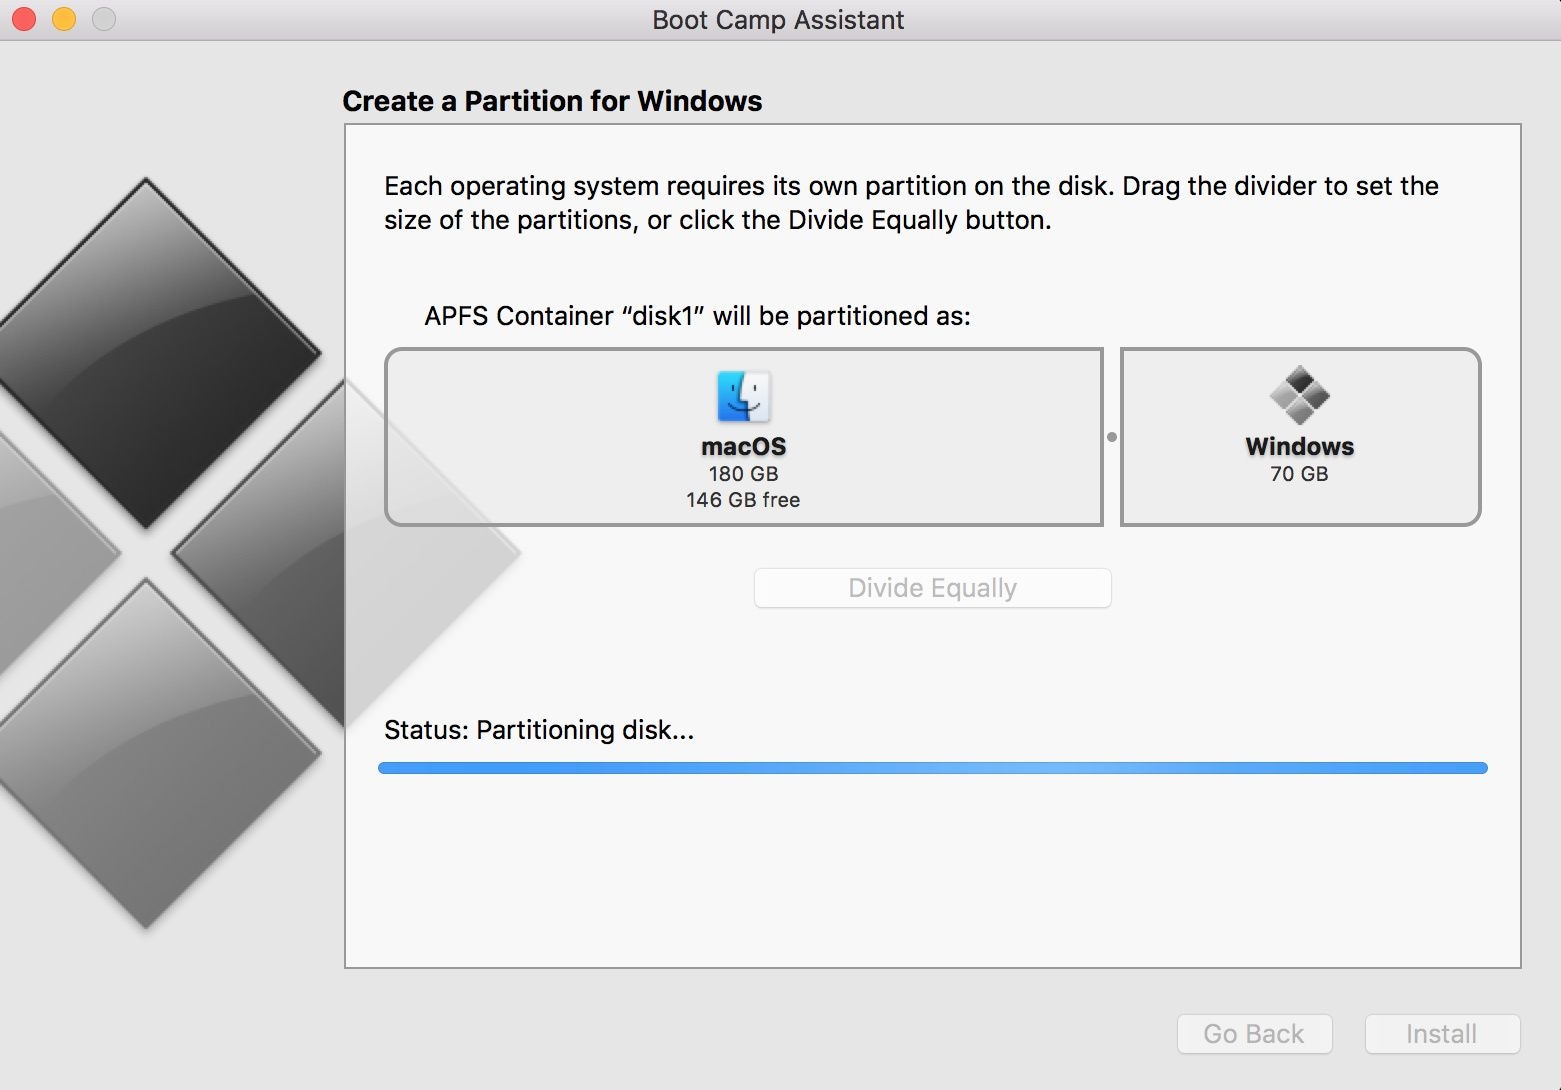
Boot Camp makes it possible for you to install Windows on your Mac. Switching between macOS and Windows thus becomes a matter of you restarting your system and deciding which OS to log into.
Step 1: Windows Installation File
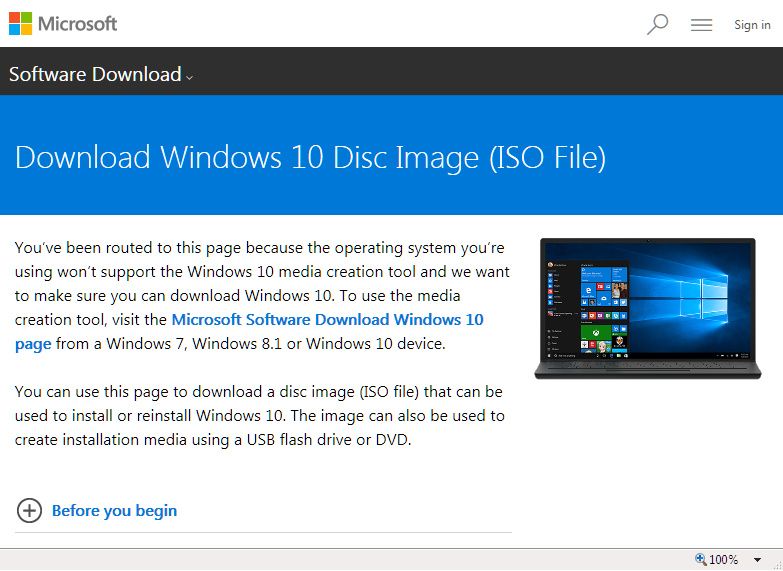
- Boot Camp is compatible with Windows 8,8.1. and 10 (you will need an ISO file of any of these three releases).
Step 2: Launch Your Mac’s Utilities folder
- Type in «Utilities» in your Mac’s search bar, then click it.
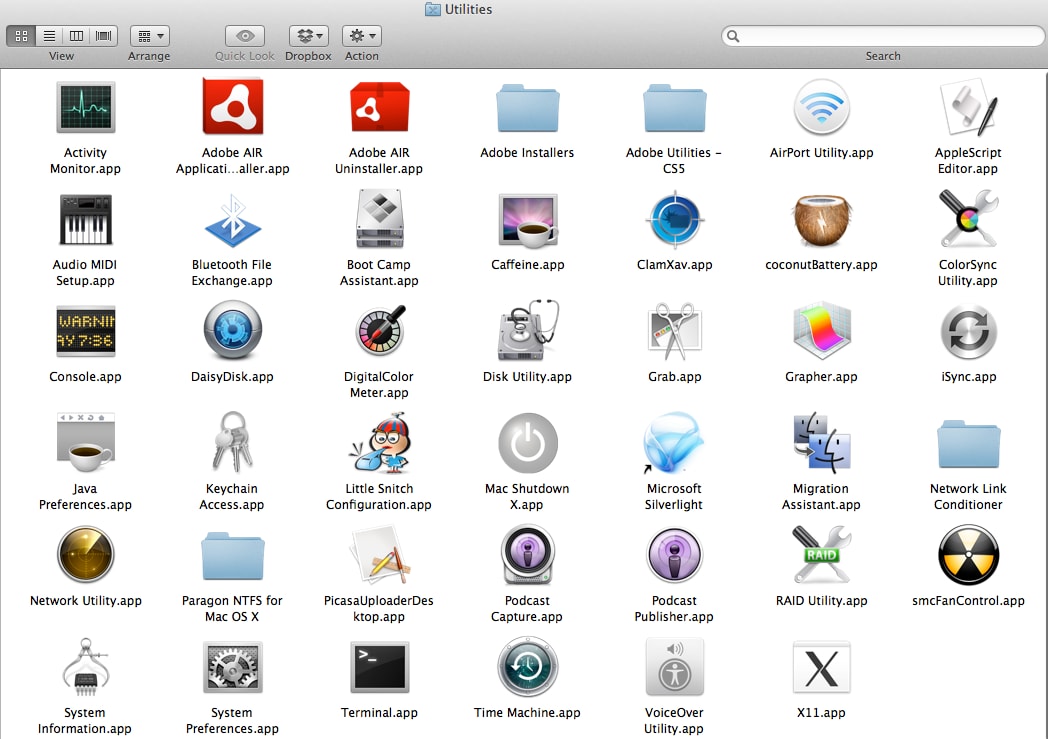
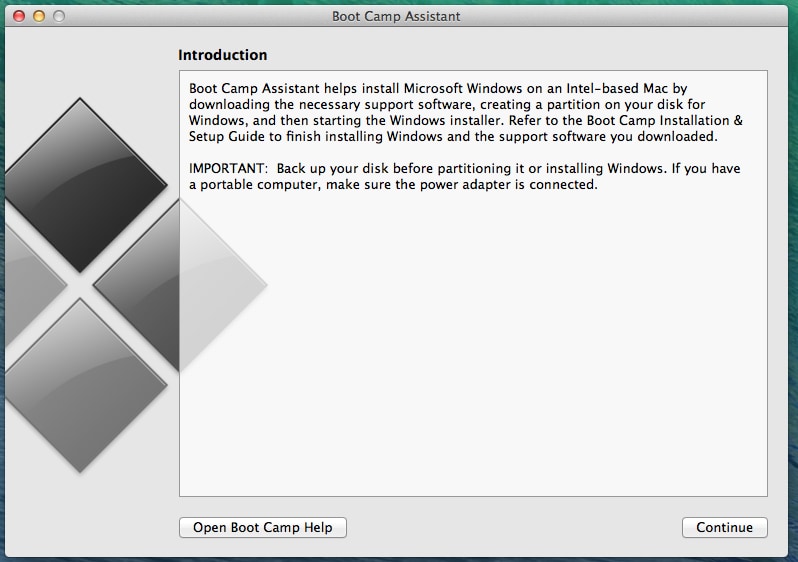
Step 3: Launch Boot Camp Assistant
- The app’s icon looks like a grey hard drive. Click it.
Step 4: On-screen Instructions
- You will be instructed to choose the Windows ISO, the drive you intend to install it on, and restart your Mac.
Step 5: Your Mac Will Restart
- Once you’re done setting up Boot Camp, you will be asked to restart Mac.
- After that, you will be taken to the Windows installer screen.
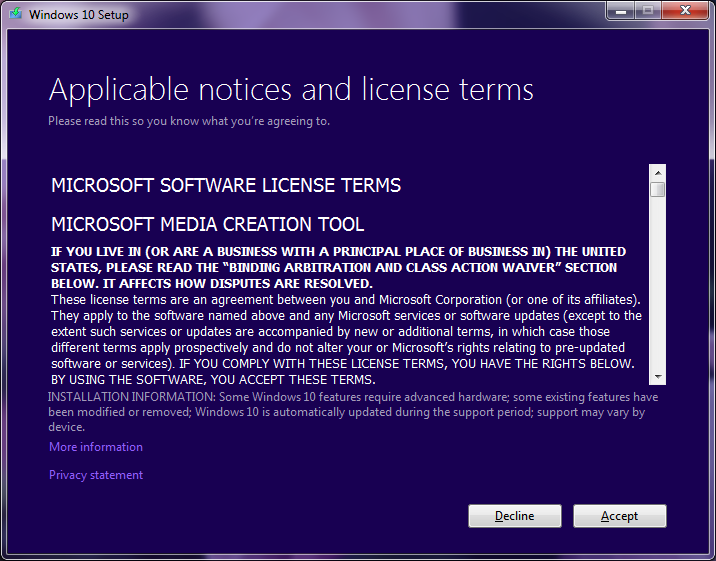
Step 6: Install Windows
- Follow the instructions to install the version of Windows you chose.
Step 7: Startup Manager
- Once the install has been completed, your system will restart. Press and hold the «Option» key while this happens and the «Startup Manager» will appear.
- Let go of the «Option» key and you will see all the drives you can boot your Mac from.

Step 8: Boot Camp
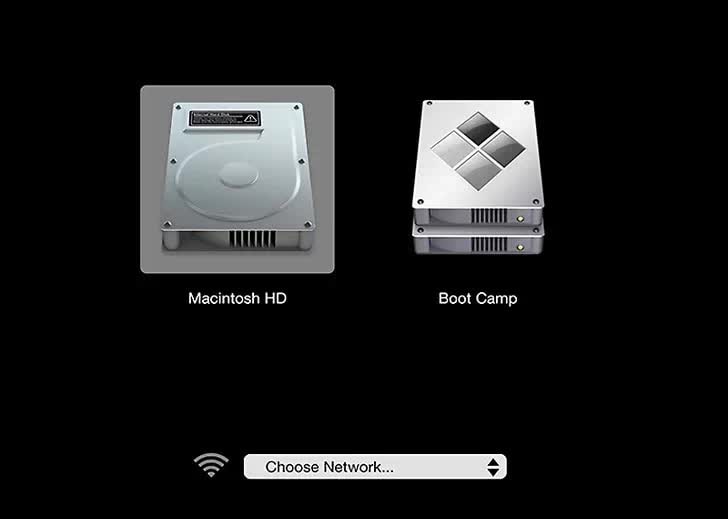
- Your Mac will now be loaded into Windows.
- Navigate to your EXE file and run it.
Run EXE Files on Mac by Remote Desktop
This free tool does what many others fail at: lets you take full advantage of your Windows apps from your Mac. That’s pretty convenient, don’t you agree? Even though you’ll need Mac and PC to use the Remote Desktop, it’s still a great software that deserves praise. Here’s how you use it:
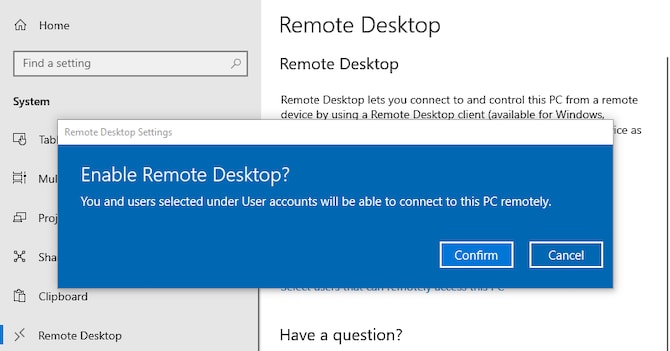
Step 1: Get Your PC Ready
- Open the start menu and navigate to «Settings», then «System», then «Remote Desktop».
- Turn «Enable Remote Desktop» on and «Confirm.»
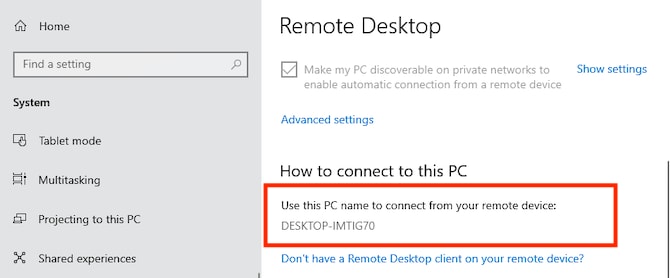
Step 2: Know Your IP Address Remote Desktop» menu, and below the «How to connect to this PC», jot down your PC name.
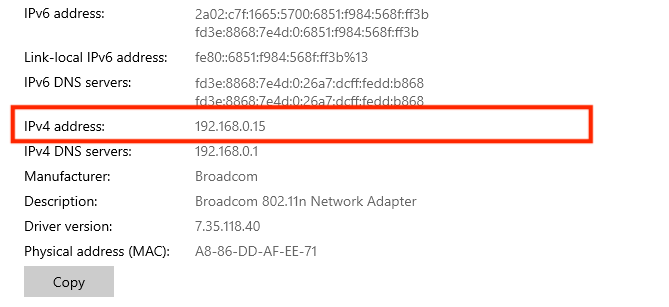
- Go to your «Settings’, then «Network .
- Click «Wi-Fi» and select the network you’re connected to. This will bring up the network connection properties screen. At the bottom of the page is your «IPv4 address». Jot it down.
Step 3: Install the Mac Version of Microsoft Remote Desktop
- Pick up your Mac and open up your Mac App Store, then search for «Microsoft Remote Desktop».
- Download and install it.
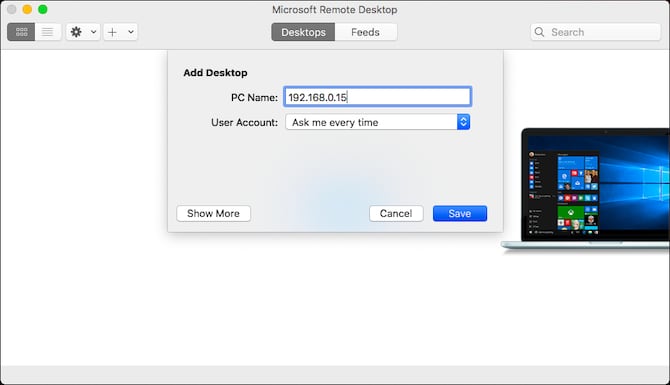
Step 4: Open Add Your PC to Remote Desktop
- Open up Remote Desktop on your Mac.
- Click on «Add Desktop».
- A dialogue box will pop up. Type in the PC Name you jotted down; if it doesn’t work, type in the IP address.
- Click «Save».
Step 5: You Can Now Connect
- Keep your PC turned on and make sure it is connected to the network your Mac is connected to.
- Remote Desktop will now show your computer below «Saved Desktops».
- Double-click on it to connect.
- You will be required to enter your username and password.
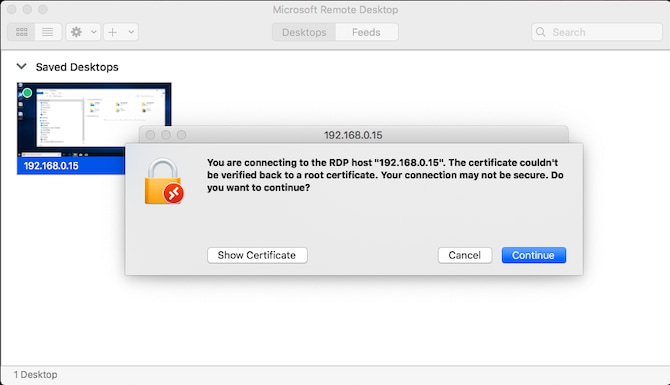
- Click «OK».
- A security warning will pop up. Since you’re on a private network, ignore the warning and click «Continue».
- That’s the last step. You can now view and use your Windows on your Mac via Remote Desktop.
Closing Words
Well, there you have it. Running your EXE files via your Mac is now a thing of the past. As long as you have the right tools, you can do it in a matter of minutes.
These tools make your Mac more versatile than even Apple intended and anticipated because they enable you to go beyond what your Mac is capable of doing. You can achieve an end goal that would have otherwise been impossible. That’s the power of a Mac for you.
A Comprehensive Guide to Files Recovery on Mac
Recent Videos from Recoverit
What’s Wrong with Mac
- Recover your data for free.
- What is New in MacOS 13 Ventura?
- Back Up Macbook Before Upgrade
- How to Downgrade MacOS System
- Files overwritten? Recover it.
- Top 5 Mac recovery tools.
- Get USB drive files on Mac.
- Recover a formatted SD card.
- Mac won’t turn on? Solved.
- Know and fix kernel panic.
- You installed macOS anyway.
- Force quit Mac to fix issues.
- Make frozen Mac responsive.
- Delete files and folders.
- Do Ctrl Alt Delete on Mac.
- Format USB to FAT32.
- What’s Other on Mac?
- 3 ways to format your Mac.
- Test Hard Drive Speed.
- What does Recovery HD do.
- Grasp Mac Internet Recovery.
- Clone your Mac hard drive.
- 7 tips for using USB drive.
Источник: recoverit.wondershare.com
Как легко запускать Windows-приложения на Mac? Приложение Wineskin
Как бы мы не любили свои Mac’и и OS X, все же полностью от Windows отказаться нельзя и иногда бывают ситуации, когда нужно воспользоваться тем или иным приложением. В качестве примера, можно привести клиенты банков, различные бухгалтерские и корпоративные специализированные инструменты, а также игры (куда ж без них). Существует несколько способов запустить Windows-приложения на Mac’е — это использование BootCamp или виртуальной машины, вроде Paralles или Virtualbox. Но если вам нужно работать всего лишь с приложениями, а не именно с операционной системой, но есть способ получше — это Wineskin, порт известного линуксоводам Wine. О нем и о том, как с его помощью запускать «виндовые» приложения в OS X, я подробно расскажу и покажу в этой статье.
Wineskin — это Mac-адаптация Wine, эмулятора (хотя не совсем правильно его так называть, потому как акроним Wine — расшифровывается “Wine Is Not an Emulator”) или так называемого слоя совместимости, позволяющего запускать приложения Windows на некоторых POSIX-совместимых операционных системах, включая Linux и Mac. Не пугайтесь, это не так сложно, как кажется и вовсе не страшно.
Установка Wineskin
1. Первым делом, нам нужно загрузить Wineskin с официального сайта. На данный момент последняя версия 2.5.12.
2. Перемещаем загруженный Wineskin.app в папку Программы и запускаем его.
3. При первом запуске нужно будет докачать свежий движок «WS9Wine», который является компонентом необходимым для работы Windows-приложений. Жмем «+» и выбираем «Download and Install».
4. Далее, устанавливаем «Wrapper», нажав на кнопку «Update». После этого вы заметите, что кнопка «Create New Blank Wrapper» станет активной.
Установка Windows-приложения
Прежде чем начать, удостоверьтесь, что у вас есть exe-файл желаемого приложения и что оно поддерживается Wineskin. На данный момент, Wineskin работает не со всеми приложениями и проверить совместимость интересующих вас приложений можно в официальной базе Wine’s AppDB.
1. Для создания нового wrapper’а («обертки») нажимаем «Create New Blank Wrapper» и присваиваем ему имя. Например, давайте установим на Mac популярный блокнот Notepad++.
2. Wineskin, предложит загрузить пакет «Mono», который понадобится для работы .NET-приложений. Соглашаемся и устанавливаем.
3. Таким же образом устанавливаем компонент «Gecko», необходимый для запуска HTML-приложений.
4. После того, как wrapper будет создан, открываем его в Finder’е, делаем правый клик и выбираем пункт “Показать содержимое пакета”.
5. Здесь у нас две папки (“Contents” и “drive_c”) и Wineskin.app.
6. Запускаем Wineskin.app и жмем “Install Software”.
7. Далее нажимаем “Choose Setup executable” и выбираем установочный файл нашего Windows-приложения.
8. Процесс установки полностью аналогичен таковому в Windows. Устанавливаем наше приложение, следуя подсказкам мастера установки.
Запуск Windows-приложения
1. Теперь нам остается протестировать установленное приложение. Для этого запускаем наш wrapper еще раз, но в этот раз выбираем пункт “Advanced”.
2. Указываем путь к папке с нашим установленным приложением, нажимаем «Test Run».
3. Приложение запустится и вы должны увидеть, что-то вроде этого.
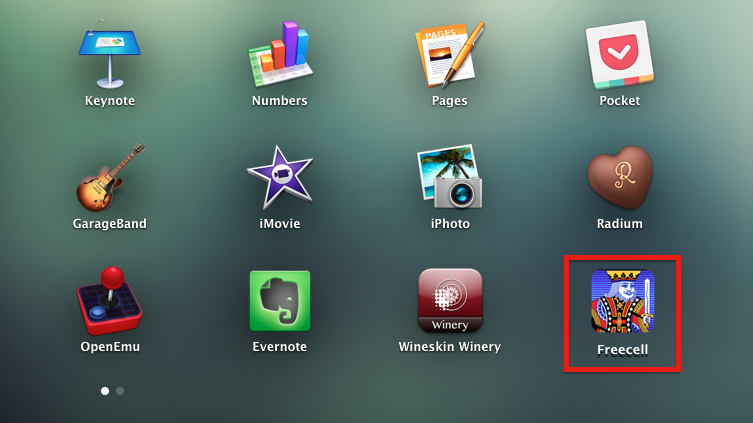
4. Все. Теперь можно запускать наше проложение прямо из Launchpad’а или папки Applications. Например, у меня это выглядит вот так.
Источник: lifehacker.ru
Запускаем игры для Windows на macOS с помощью Game Porting Tool

После анонса новой операционной системы macOS Sonoma, компания выпустила специальную утилиту Game Porting Tool. Он позволяет перенести Windows-игры на Mac, не редактируя код.

На форуме Reddit уже можно найти много примеров работы популярных игр на Mac. Теперь вы сможете поиграть в такие хиты, как Cyberpunk 2077, Diablo IV, Hogwarts Legacy, Spider-Man (2018), Sonic Omens, Elden Ring и SpongeBob SquarePants: The Cosmic Shake. Например, Cyberpunk 2077 работает на MacBook Pro с M1 и 16 ГБ ОЗУ на ультра-настройках со скоростью около 15 FPS, а на чипе M2 Max, выдает уже 40 FPS. Интересно, что если понизить настройки графики, то Cyberpunk 2077 все равно будет работать максимум на 40 FPS.
Популярный Ведьмак 3 с DirectX 12 тоже выдает максимум 40 FPS на процессоре M1 Pro. Но с DirectX 11 и средними настройками графики игра идет на 48-50 FPS. При этом MacBook Pro нагревается в среднем до 65 градусов и не включает вентиляторы.
Пользователи предполагают, что ограничение FPS связано не с железом (его запаса достаточно), а с рендерингом. Все игры были портированы без какой-либо дополнительной оптимизации. Кроме того, во время их работы не задействован игровой режим macOS Sonoma, который повышает частоту процессора в играх.
Как же вам запустить любимую игра на Mac? Легко…
Нам потребуется:
- Процессор Apple Silicon
- Минимум 16 ГБ оперативной памяти
- Минимум 50 ГБ свободного места на диске (зависит от размера игры)
- Бета-версия macOS Sonoma
Установка Game Porting Tool
- Скачайте и установите Game Porting Tool с сайта Apple для разработчиков.
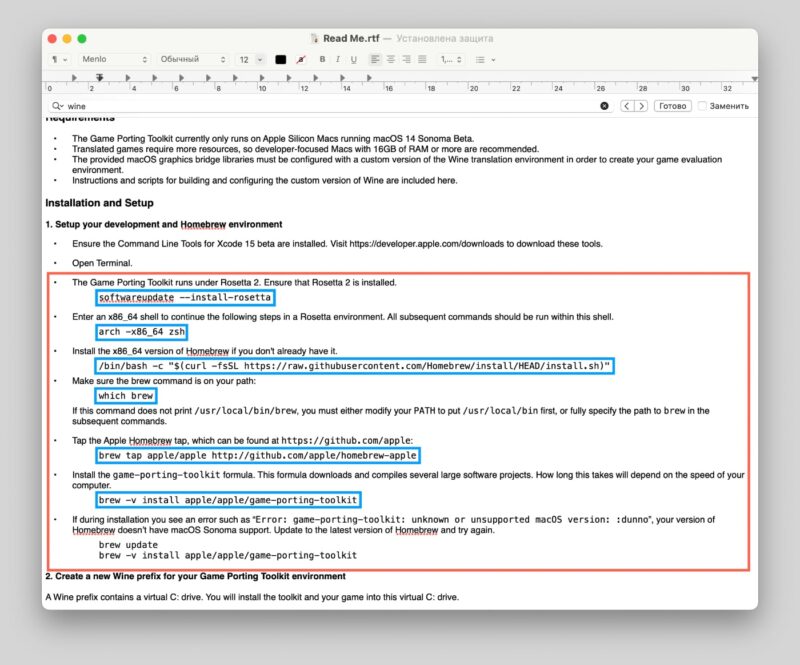
- После установки приложения, откроется окно с различными файлами. Надо открыть файл Read Me.rtf и установить весь софт из пунктов 1-3.
- Скачайте и установите Command Line Tools for Xcode 15 beta с официального сайта Apple для разработчиков.
- Откройте Терминал и установите весь софт, который выделен красным на скриншоте. Для этого поочередно вставьте в Терминал код, который выделен синим.
- Создайте новый префикс Wine для Game Porting Toolkit. В данном случае нужен виртуальный диск C:, на который будет установлена игра.
- Для этого в Терминале надо запустить команду WINEPREFIX=~/my-game-prefix `brew —prefix game-porting-toolkit`/bin/wine64 winecfg
- Затем на экране должно появиться окно Wine configuration
- Измените версию Windows на Windows 10
- Нажмите Применить и закройте winecfg
- Установите набор инструментов для Wine, запустив в Терминале команду ditto /Volumes/Game Porting Toolkit-1.0/lib/ `brew —prefix game-porting-toolkit`/lib/
Установка Diablo IV
- Скачайте установщик Battle.net для Windows
- Переместите его в Wine, выполнив команду в Терминале cp ~/Downloads/Battle.net-Setup.exe ~/my-game-prefix/drive_c/users/crossover/Downloads/
- Перед запуском Battle.net обновите номер сборки Windows, иначе Diablo IV не запустится. Это можно сделать с помощью команд
WINEPREFIX=~/my-game-prefix `brew —prefix game-porting-toolkit`/bin/wine64 reg add ‘HKEY_LOCAL_MACHINESoftwareMicrosoftWindows NTCurrentVersion’ /v CurrentBuild /t REG_SZ /d 19042 /f
WINEPREFIX=~/my-game-prefix `brew —prefix game-porting-toolkit`/bin/wine64 reg add ‘HKEY_LOCAL_MACHINESoftwareMicrosoftWindows NTCurrentVersion’ /v CurrentBuildNumber /t REG_SZ /d 19042 /f
WINEPREFIX=~/my-game-prefix `brew —prefix game-porting-toolkit`/bin/wineserver -k
- Запустите Battle.net, с помощью команды в Терминале: /Volumes/Game Porting Toolkit-1.0/gameportingtoolkit ~/my-game-prefix «C:userscrossoverDownloadsBattle.net-Setup.exe»
- Откроется окно установки Battlenet, после чего можно установить и запустить Diablo IV
Пока что все инструменты работают в бета-версии, поэтому возможны различные ошибки. В файле Read Me.rtf есть информация по их решению.
Также стоит учитывать, что сейчас не все игры можно перенести на Mac, а те, что можно, не всегда работают стабильно, даже на этапе установки. Например, Battle.net может не запуститься с первого раза. В таком случае нужно повторить команду из четвертого пункта.
Источник: i-ekb.ru